When I get an idea in my head, there’s usually no stopping me. It kind of becomes all-consuming and I usually start putting plans into place almost immediately. Take for example the most recent change that took place in our house. On Saturday, I posted a playroom inspiration board since my husband and I agreed on changing the front room in our house to a playroom. I talked to my mother-in-law on Sunday and she said, “On Saturday morning I saw the inspiration board on your site along with you saying that you were going to change the room in your house. That night, I received a picture message of the completed playroom. You move fast, girl.” That I do.
To recap … On Saturday morning, my husband and I moved our couches out of the front room and into the basement. The front room was primarily being used by the dogs. They loved hanging out in the room and I thought it was kind of silly to have a room just for the dogs. Why not turn it into a room that can serve as playroom and holding space for all of our son’s toys?
As soon as my husband left for work on Saturday, I put Hudson in his car seat and we drove all over town picking up all sorts of accessories and items needed to create the perfect playroom for him.
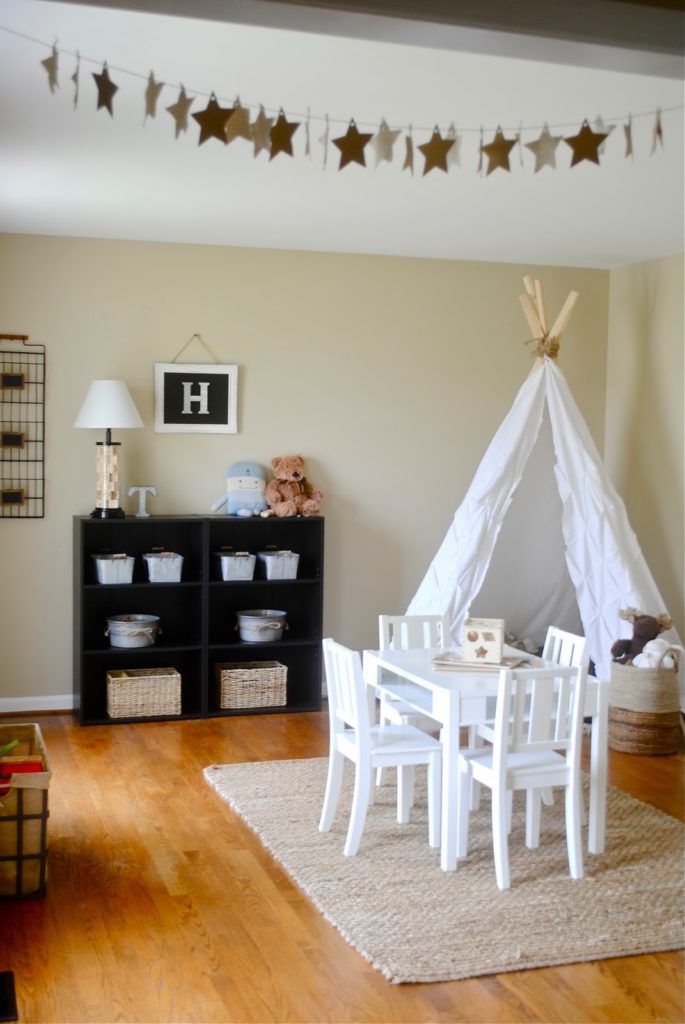
From galvanized bins to wall hangers, a playroom table to pieces of wood, our car was loaded and ready for me to get to work. After I put my son to sleep, I cranked up the music, broke out the power tools, cleaned the room from top to bottom, and set myself a goal of getting his room ready by the time I put my head on the pillow.

After spending time on Pinterest looking at playroom ideas, I started to notice a trend on the images that I kept pinning to my Playroom Inspiration Board. Many of the playrooms had a teepee in it. I searched the Internet looking for places that sold teepees and almost clicked the “buy” button on a few of them. The only thing that stopped me was the price. I couldn’t imagine spending a couple hundred dollars on a teepee for the playroom. There had to be a simpler solution.
During our errands, I went to Lowe’s and picked up six 1x2x8 pieces of wood. After measuring 12 inches from the top on each piece of wood, I drilled a hole and fed twine through each of the holes to help bring all of the pieces of wood together. From there, I stood on a step stool and positioned the wood the way that I wanted them to stay. I quickly wrapped the twine around all of the pieces until they stayed in place.
Warning: You might want a second pair of hands to help put together the teepee. I usually tackle these projects by myself since I have very little patience. The thought of waiting until my husband was home from work so that he could help me never crossed my mind.

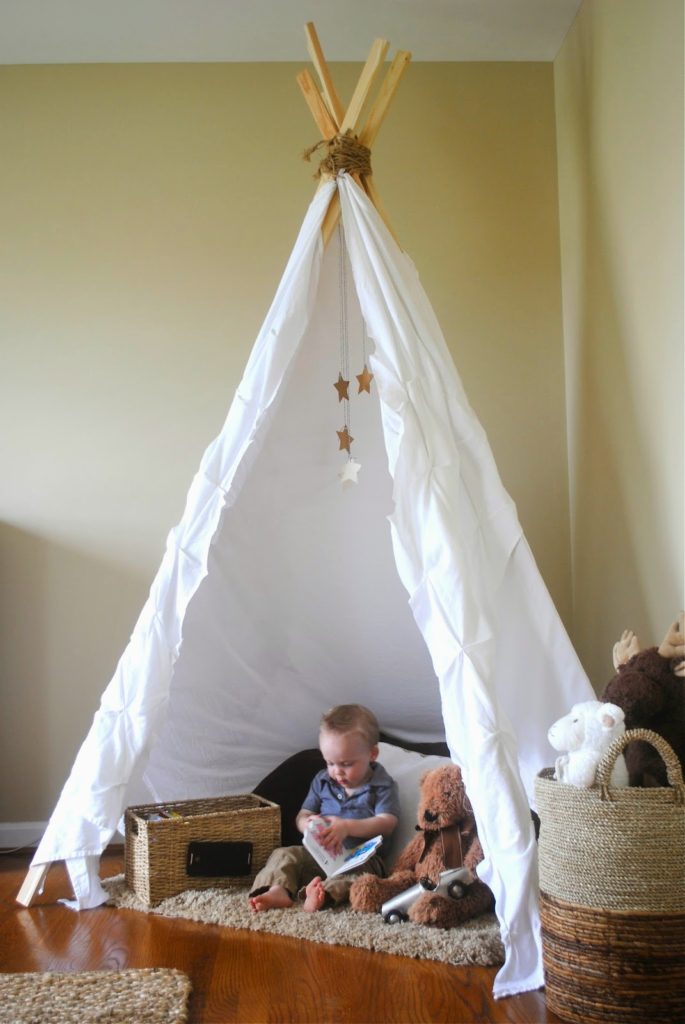
Once the pieces of wood were in place, I took a bedsheet and draped it along the backside of the teepee. I also cut up an extra shower curtain that I had in my linen closet and draped it on either side of the teepee opening. I took a step back and laughed hysterically. I built a teepee. We had a teepee in our home. Hilarious!
The next day, I brought my son downstairs, rounded the corner into the playroom, and I saw his face light up. I set him down and he walked over to the teepee and sat down in the middle of it.
Create a space for my son that he will love? Mission accomplished.
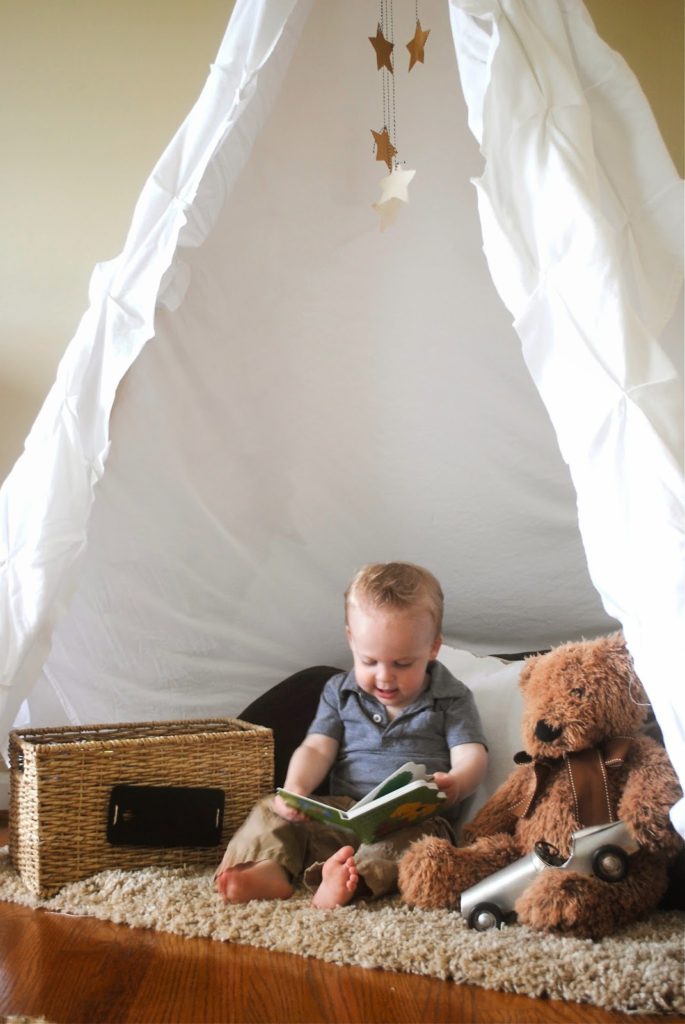
My favorite moments over the past few days since making the playroom have been walking into the room and seeing him in his teepee flipping through books. You guys. My heart just about explodes from happiness. It is seriously such a great feeling.
Remember building forts out of pillows and bed sheets and using books to anchor the sheets? Scratch that idea. For just $20 and using items found throughout your home, you can build a super simple, no-sew teepee that your kids will love.
How To Build a No-Sew Teepee
Materials:
- Six 1x2x8 pieces of untreated wood
- 3 feet of twine
- 1 power drill
- 1 measuring tape
- 1 pencil
- 1 Step stool
- 1 bedsheet
- 1 fabric shower curtain
- Hot glue gun
Directions:
- Measure 12 inches from the top of each 1x2x8 piece of wood and mark the spot with a pencil. Drill a hole at each 12-inch mark.
- Feed the twine through each hole.
- Use a step stool and hold the pieces of wood in place until they form a teepee that meets your desired look.
- Wrap the twine tightly around the pieces of wood until they wood stays in place.
- Drape a bedsheet along the back of the teepee to cover the openings.
- Cut a fabric shower curtain in half to form triangles. Place one triangle at the left-side opening and one triangle at the right-side opening.
- (Optional) Glue the pieces of fabric into place.
What are playroom must-haves?


Leave a Reply