Fresh fish is one of the healthiest foods you can eat. It is packed with healthful vitamins and minerals and it is rich in omega-3 fatty acids. Why, might you ask, do I need omega-3 fatty acids? It’s simple. Studies have shown that it is great for your heart (among other things), especially since it lowers the chance of heart disease.
Due to its many health benefits, fish should be enjoyed but in moderation. Consuming fatty-fish one to two times a week is highly recommended by a great number of medical professionals. Non-fatty, protein-rich fish can be enjoyed as often as desired.
Depending on the flavor and texture you want your fish to have, there are many different ways to prepare fish whether you are working with steaks, fillets or whole fish. Do your body a favor and enjoy healthy and delicious fish using the techniques outlined throughout this post.
Selecting Fish
When selecting fish, it is important to use three out of your five senses:
- Smell: When buying fish it is extremely important that you smell it to ensure that it is fresh. The fish should smell sweet and, ironically, not fishy. If it smells fishy or has other strong flavors the fish is past its prime so it is best not to purchase it.
- Sight: It’s also best to examine the fish when checking for freshness. Whole fish should have bright eyes and firm flesh; whereas fillets and steaks should be firm and bright looking with no brown spots or discoloration.
- Touch: When examining fish with your eyes, it’s important to touch them to feel for firmness. Fresh fish is never soft. Instead, it is very firm to the touch.
Storing Fish
Fresh fish can be stored in a refrigerator tightly wrapped for up to two days at the most. To ensure that the fish that I prepare tastes the best, I always buy my fish the same day that I plan on preparing it. If this isn’t possible and the fish needs to be kept cold for more than a few days, be sure to wrap the fish tightly and place it in the freezer until ready to use. To thaw the fish, simple run it under cold water.
Cooking Fish
- Baking
- Prepare the oven and fish: Heat the oven to the correct temperature (for fish it generally ranges from 375 to 450 degrees). Prepare the fish by rubbing extra virgin olive oil all over it, as well as drizzle oil lightly over the baking dish.
- Bake until fish reaches correct temperature: Place fish on baking dish and bake for 10 minutes per inch of thickness uncovered and flip for additional 10 minutes, or until fish is done.
- Broiling
- Preheat the oven: Make sure the oven is nice and hot by preheating the oven to 350 degrees.
- Line a baking sheet: Using aluminum foil or parchment paper, line a baking sheet. Rinse and pat dry the fillets and place them on the sheet skin side down.
- Cook fish according to thickness: Feel free to coat the fish in a sauce or season with spices and herbs. Bake fillets for 10-12 minutes and remove from the oven when the fish is browned.
- Frying
- Wash and rinse: For fillets, it is important to make sure that each fillet is the same size so that all of them will cook properly. For whole fish, the internals need to be removed and horizontal scores need to be made along the body. Wash and rinse the fish and allow it to drain in a colander for a few minutes. Season the fish with salt and pepper.
- Prepare the pan with oil: Pour the oil into a pan and heat the oil over medium heat. Test the oil to see if it’s ready for frying by tossing a small bread crumb into the oil. If it sizzles, then the oil is ready.
- Roll the fish: Coat the fish in flour by rolling it to create a nice outer coating.
- Place the fish in the oil: Fry the fish by placing it in the hot oil. The fish is done when it turns a golden brown color. Once they start floating to the top they are fully cooked and are ready to be removed from the oil.
- Grilling
- Buy the right fish: When grilling fish, it’s best to stick with whole, fillets or steaks. Fillets might give you a little trouble because they tend to fall apart easier than steaks. Whole fish and steaks are thicker and hold together better even though they take longer to cook.
- Make sure the grill is nice and hot: It doesn’t matter what type of grill you use, the only thing that matters is that the grill is nice and hot. Once the fish is placed on the grill, it should immediately sear to lock in the juice and firm the flesh.
- Brush the grill with oil: Brushing the grill with extra virgin olive oil will help keep the fish from sticking. It’s also a good idea to coat the fish with extra virgin olive oil before placing on the oiled grill.
- Glaze once fish is seared: Cook the fish on high for 2 minutes on each side to give the sides a nice sear. Then turn down the heat and apply the glaze or sauce and continue cooking until it is done.
- Cook according to thickness: The basic rule when it comes to grilling fish is 8 minutes per inch of thickness or 10 minutes per inch if it’s a whole fish. The fish is completely cooked with it starts to flake off with a fork.
- Pan Frying
- Prepare nonstick skillet: Heat butter or extra virgin olive oil in a nonstick skillet over medium heat and place the fish in skillet once the skillet is nice and hot.
- Cook according to thickness: Cook the fish four to five minutes one side and flip, cooking for an additional four to five minutes on the other side.
- Poaching
- Use a large pan: The fish will need to be flat when cooking so a large pan is needed.
- Make your own court-bouillon or use already-prepared stock: Place the fish in the pan and pour enough liquid into the pan to cover the fish. Bring the liquid to a simmer during the cook time. If any bubbles come up from the bottom of the pan it is too hot.
- Cook according to thickness: Remove the fish from the pan when it is fully cooked.
- Roasting
- Coat the fish in oil and seasonings: The oil and seasonings on the fish will caramelize and turn the fish a lovely color after being placed in the oven.
- Make sure the oven is hot: High oven temperature helps to concentrate the flavors of the fish.
- Roast according to thickness: Roast for approximately 10 minutes per inch of thickness and flip the fish once during the roasting time.
- Steaming
- Decide on steaming technique: Fish can be steamed using a bamboo steamer, a metal steamer or aluminum foil:
- Bamboo steaming: Prepare the fish by seasoning it with spices, herbs or salt and pepper. Either place fish in a shallow casserole dish that will fit inside the bamboo steamer or wrap the fish in a cabbage leaves (using toothpicks to keep it closed around the fish). Fill a wok, pan or pot with 1-2 inches of water and place steamer on the water. Cover the steamer and steam for approximately 10 minutes or until the fish is white and flaky but still moist.
- Metal steaming: Rub the fish with spices or herbs, depending on preference. Pour about 1 1/2 inches of water into a pan. Place the steamer over the water, place the fish on the steamer, cover the pot and bring the water to a boil. Check the fish after 10 minutes to see if it is fully cooked.
- Aluminum foil steaming: Rub the fish with spices or herbs, depending on preference. Spray aluminum foil with nonstick spray and place fish in the center. Fold four sides of the foil up to prevent juices from escaping. Place the fish on a steamer tray and steam until fully cooked.
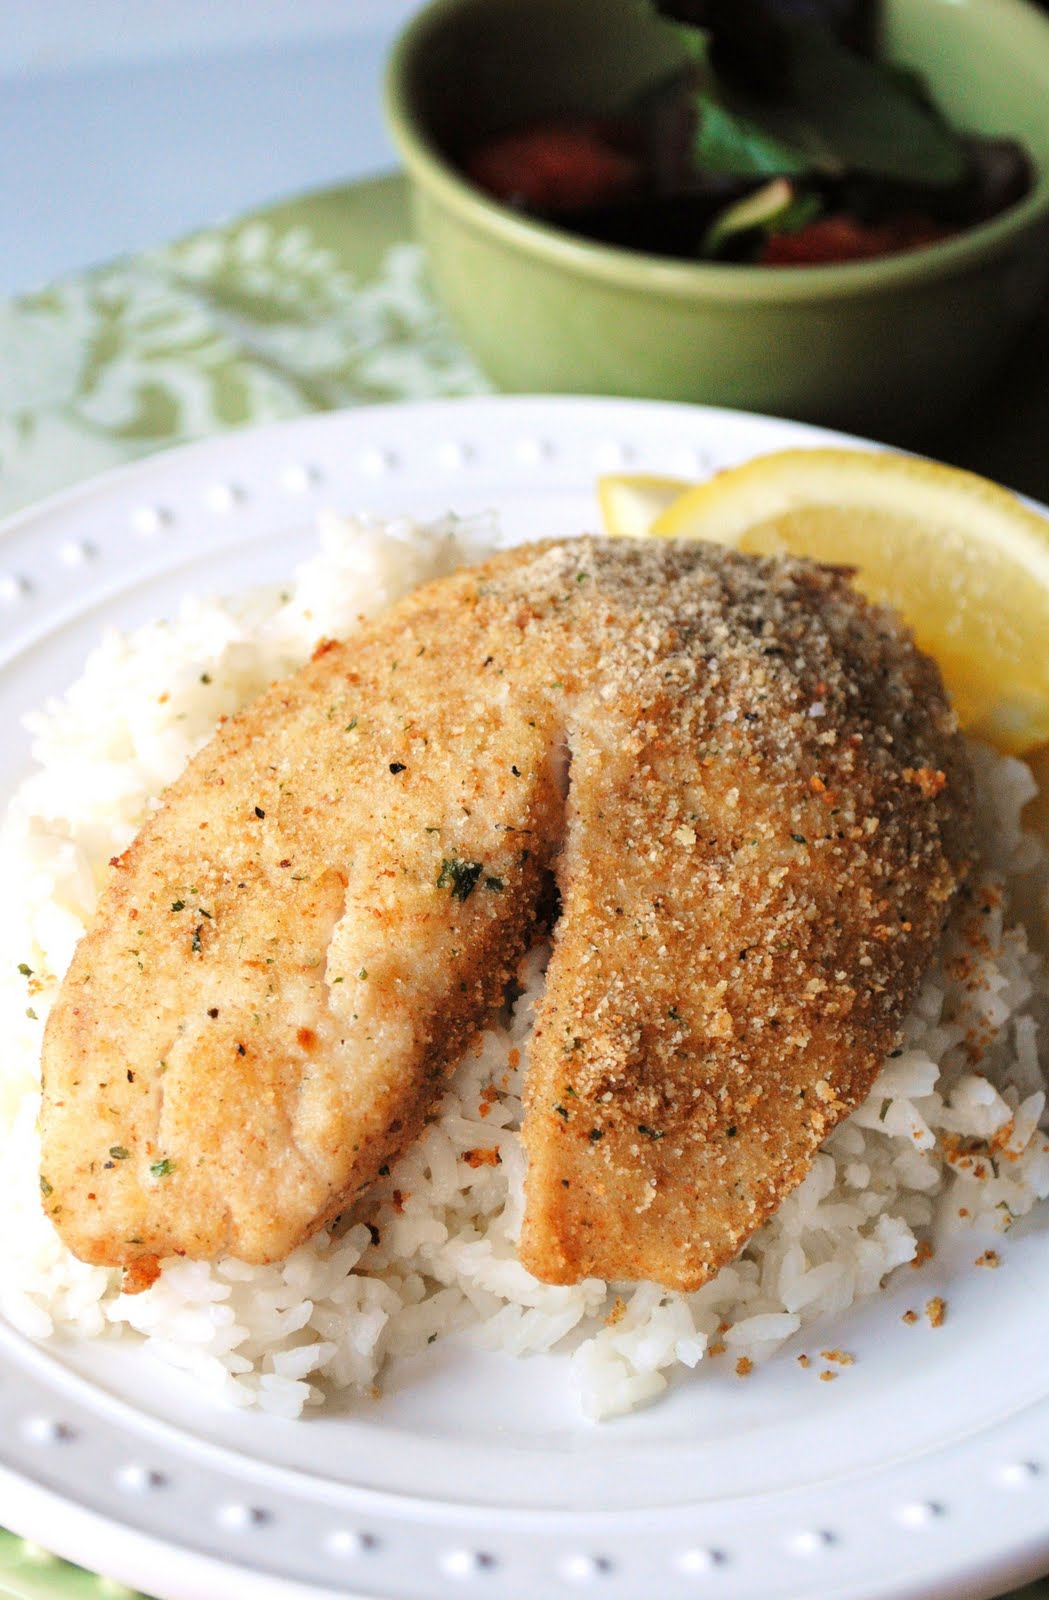
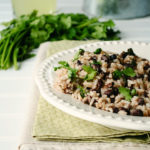
One of my favorite ways to enjoy fish is to serve breaded and baked Tilapia over a bed of garlic and herb rice with Bell Pepper Salad drizzled over top and a salad on the side.
Parmesan-Encrusted Tilapia
Ingredients:
- 1 cup Italian seasoned bread crumbs
- 1 tablespoon grated Parmesan cheese
- 1/2 teaspoon salt
- 1/4 teaspoon black pepper
- 2-3 tablespoons extra virgin olive oil
- 3-5 Tilapia fillets
Directions:
- Preheat oven to 375 degrees. Take your baking dish and lightly drizzle olive oil all over the dish.
- In a plastic bag, combine and mix together bread crumbs, Parmesan cheese, salt and pepper.
- Pour 2-3 tablespoons of extra virgin olive oil onto a plate and place fillets, one at a time, onto the plate, making sure to coat both sides of the fillet with the oil.
- Drop the fillets, one at a time, into the plastic bag filled with the bread crumb mixture and shake to coat well.
- Remove from the bag and place on the prepared baking dish. Repeat with remaining fillets.
- Bake uncovered for 10 minutes and then flip the fillets and continue to bake for another 7-10 minutes, or until fish flakes when poked with a fork.
What’s your favorite kind of fish to cook and enjoy?


Great tips! My hubs loves grilling fish. Grilled fish tacos are our favorite!
Oh man, that fish looks just perfect!!
I'm really enjoying your blog. So many great tips! I love seafood, and can live on it everyday. That photo on the top is making me hungry!
Thanks I really enjoyed your tips. Great blog.
I loved this, except that I used walleye instead and sprinkled on a bit of garlic powder. Delicious!
I really enjoyed your tips. Great blog. than for posting.
I love seafood, and can live on it everyday. That photo on the top is making me hungry! thanx for the info.
I used walleye instead and sprinkled on a bit of garlic powder. Delicious! thanx for the post.
Delicious! I love seafood, and can live on it everyday. That photo on the top is making me hungry, thanx for the pictures.
Wow, loves grilling fish, Grilled fish tacos is one of my favorite! thanx for posting.
This was a hit at my house! I added an extra tablespoon of Italian seasoning, and a teaspoon of garlic powder. Also good with chicken breasts.
Yum, I made a second batch with the other half of a large fillet. I softened the butter with a tsp or so of anchovy paste and backed off on the salt. Yum…
You really give us a especial treat for sharing this ideas and information.Thank you for the recipe info.
Well, I used walleye instead and sprinkled on a bit of garlic powder. Delicious, i must try this, at home.
This is a perfect meal for a hard working husband. I'm sure it taste really good. I will try it for our dinner. Thanks a lot!
Thanks for the brilliant tips on Selecting Fish. I really like it. Thanks for the share.
There are Conventional, Convection, and Deep-Fry instructions, but no toaster oven warnings, nor is there a warning against it as some things often have. I'm sure I won't die if I cook it 'til it flakes with a fork, but I want to know if any quality, flavour, or nutrition (significant amounts) will be lost in doing this.
Very yummy! I added bread crumbs. Next time I'm going to try it without them (so more like the original recipe) because I ended up having to add a bunch of extra mayo to make it spreadable.
Jillian: You can definitely cook the fish in a toaster oven. Be sure to set the temperature appropriately and cook until the fish flakes with a fork. The quality, flavor and nutrition should not be lost while using this method since it's very similar to baking fish in an oven.
This wasn't the easiest nor cleanest recipe to make but it was extremely tasty! I will make again but next time I'll lower the heat so to not brown the butter.
Christy: I'm sorry you found the recipe to be messy and not very easy to prepare! I don't run into these issues when I prepare this dish. I'm glad to hear that you enjoyed the taste! It's one of my favorite dishes to prepare!
This wasn't the easiest nor cleanest recipe to make but it was extremely tasty! I will make again but next time I'll lower the heat so to not brown the butter.
Nice Tips, I really like it. Thanks for the post! It was very informative post for me.
Nice n Informative tips, thanks for the share!
Fish is a great healthy food…thanks for sharing.
I'm really enjoying your blog. So many great tips! I love seafood, and can live on it everyday. That photo on the top is making me hungry!
Thanks I really enjoyed your tips. Great blog.
This is one of the best post that I have ever read. You have provided a great piece of information. I will definitely share it with my other friends. Keep up the good work, I would to stay in contact with your posts.
ptc
Got a thumbs up from my whole family. However, we used plain sourdough bread crumbs (I take the heels and grind them and keep them in the freezer). I also added about 1 T parsley (fresh from my garden and allowed to dry out a bit). I pan seared them in coconut oil and butter for about 2 min each side and then finished them up in the oven while I prepped side dish. Oh, and they went GREAT with a quinoa salad made with chopped veggies and a balsamic / EVOO dressing.